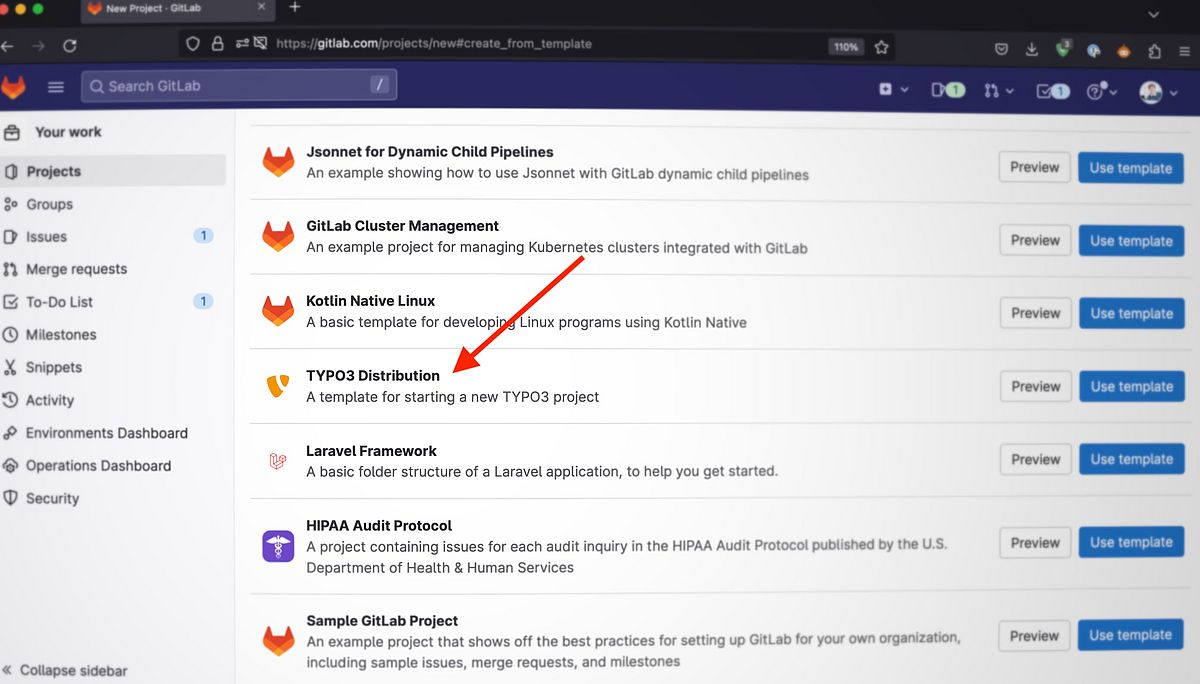
Using the new template is easy: Just create a new project and select Create from template. GitLab will show a list of available templates. Locate the TYPO3 Distribution and hit the Use Template button. Give your project a name and Gitlab will import the project for you. This allows you to have a "ready-to-code install" in almost no time.
Start a New TYPO3 GitLab Project Now Video: Watch the Complete Setup Process
Tools
The template uses these tools:
- DDEV: For a local environment with PHP, web server, and database
- NPM/Webpack: Compile frontend assets like CSS and JavaScript
- Deployer: Deploy the application to the server
Project Setup
After the project has been cloned, run these commands from within the projects folder. Don't forget to give the DDEV project a suitable name.
    ddev config --project-name=my-typo3 --project-type=typo3
    ddev composer install
    touch public/FIRST_INSTALL
    ddev start
Now TYPO3 is running, but the frontend still needs initialization.
    npm install
    npm run build:production
    ddev composer dumpautoload # Required to publish _assets
    ddev typo3 extension:setup # Initialize page tree and content
That's it.
Code Analysis & Quality
The template ships with a basic configuration for PHPStan and CS-Fixer. You can run them
locally:
PHPStan:
./vendor/bin/phpstan analyse -c .phpstan.neon --no-progress
CS-Fixer:
./vendor/bin/php-cs-fixer fix --dry-run --diff
Deployment
The deployment workflow uses GitLab CI (see .gitlab-ci.yml) together with Deployer. Take a look at deploy.yaml in the project root and change it to your needs.


